Creston Valley COVID-19 and Omicron – Updated Information About Travel Insurance

COVID-19 and Omicron – Updated Information About Travel Insurance

Travel plans? Amidst new restrictions, there’s new information about COVID-19, the Omicron variant and your travel insurance.

With the skyrocketing numbers of new cases across the country – and the world – the Canadian government reinstated the level 3 “avoid non-essential travel” advisory. Fortunately, the announcement in late 2021 does NOT impact our COVID-19 travel insurance coverage. As of November 30, 2021:

When you purchase our travel insurance online, we provide COVID-19 coverage up to the policy limit under our Emergency Medical Insurance plans for vaccinated Canadians. And while COVID-19 testing is not covered, we can provide travel insurance to travellers no matter the travel advisory levels issued by the Canadian government.

Travel coverage includes Trip Cancellation & Trip Interruption Insurance. If you have to cancel or interrupt your trip due to a medical condition related to COVID-19, you’re covered. Additionally, Cancel for Any Reason Coverage can be added to protect you – a 50% reimbursement – should you have to cancel your trip for any reason (more than 5 days before your departure date).

Travel requires more planning – but shouldn’t stop you!

One of the main questions we get these days is about travel insurance and if it’s affected by COVID-19.

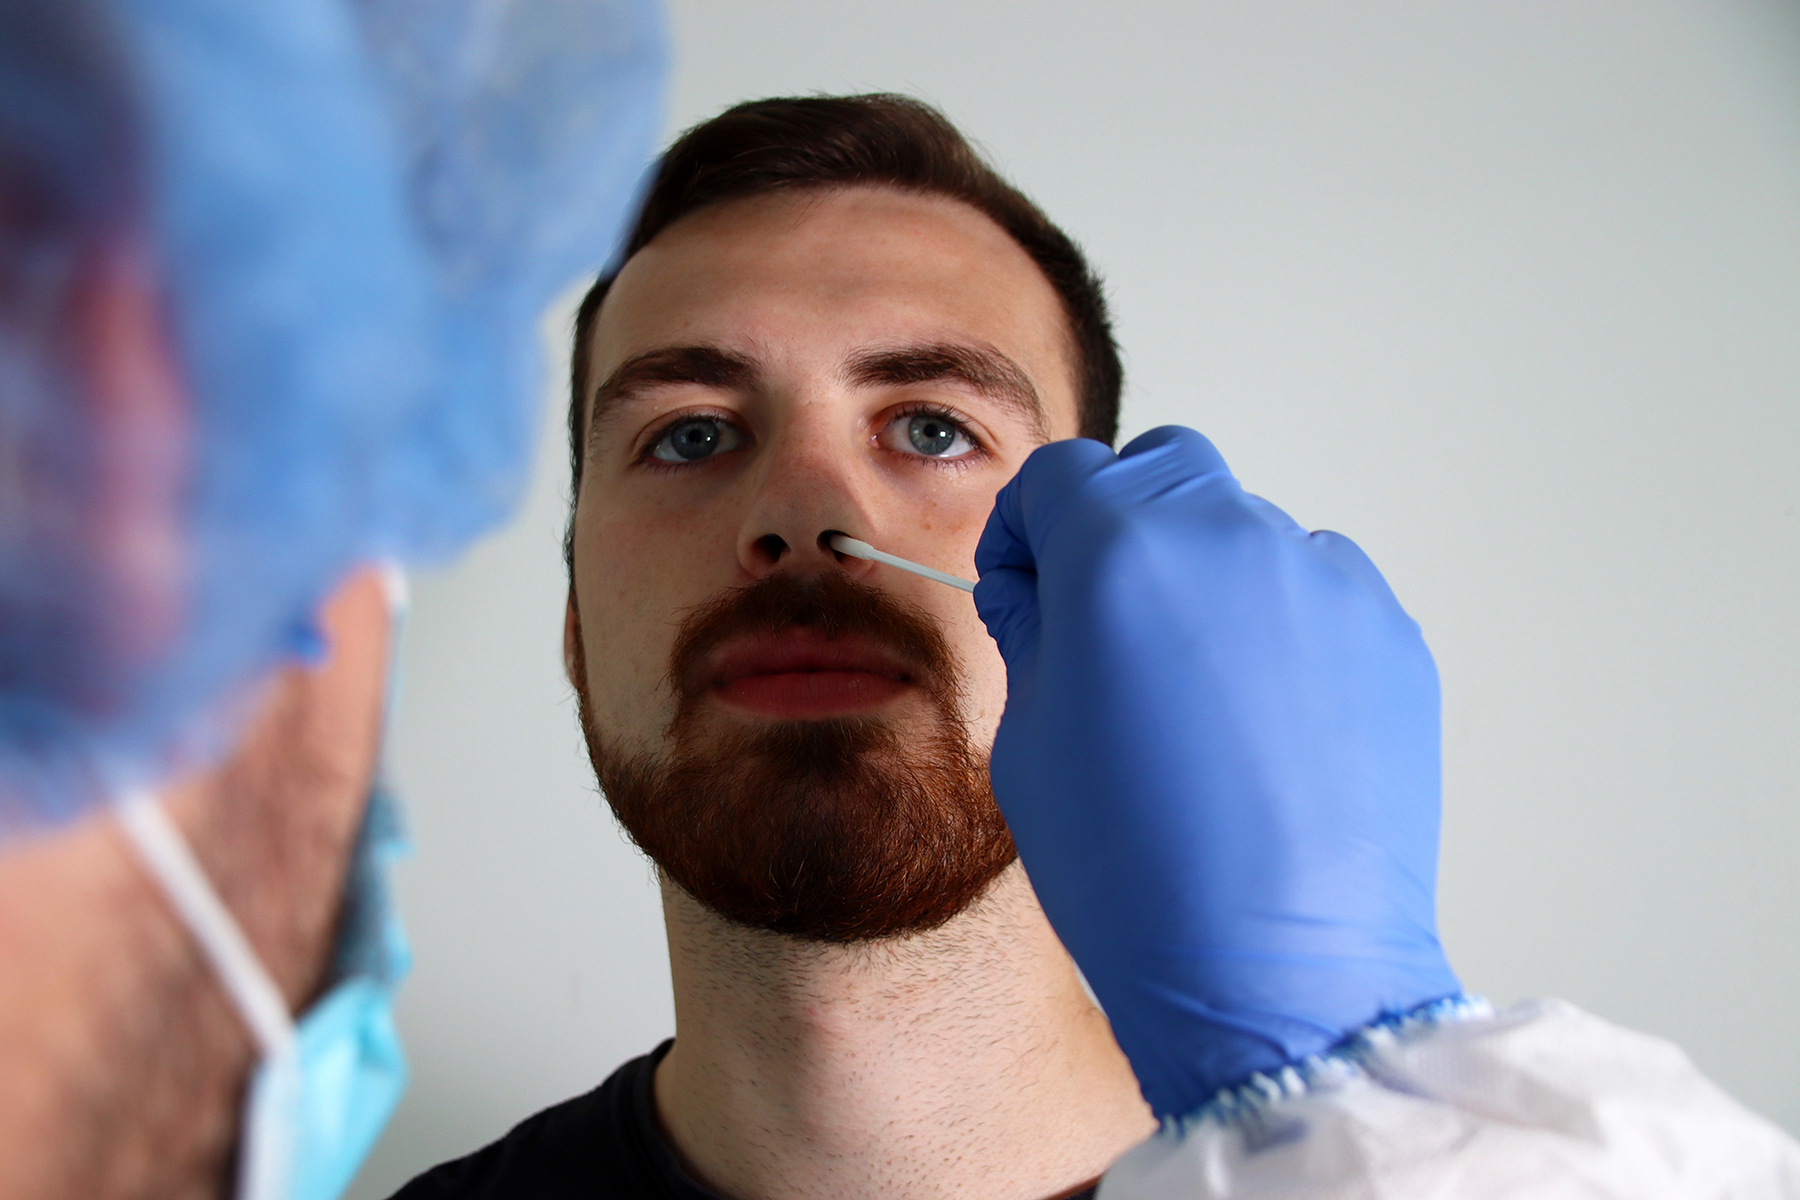
Despite the revolving door – restrictions, opening up, more restrictions – we are eager and ready to travel again! Beyond our provincial and national borders. But, due to the pandemic, there is a lot more to consider when we make our plans – please note the COVID-19 testing details in bold below.

But, we want to reassure you. We want you to know you can travel again AND enjoy the peace of mind knowing you’re protected in the event of a COVID-19 exposure or infection and any related trip interruption or cancellation.

But, it’s important to understand that to enjoy travel that is as stress-free as possible, we urge you to prepare as much as possible. Flying by the seat of our pants adventuring isn’t as easy as it used to be! Do your homework and plan accordingly – know exactly what your destination of choice requires.

As you make your travel plans and take the steps to book your trip, consider the following:

  • Can you change your plans after you’ve booked your trip?
  • What is the cancellation policy or what happens if you have to change your plans once you’re abroad?
  • What are the details of your travel insurance coverage?

Considerations to help you prepare for travel

  • Regularly refer to the Government of Canada website in addition to that of your destination to stay on top of any new rules or travel limitations and/or restrictions.
  • Will you need to bring proof of vaccination?
  • Will you need to provide a negative COVID-19 test before entering your destination? Don’t be surprised if you are required to test again after you arrive at your destination.
  • Understand before you travel that you will NEED proof of a negative COVID-19 test within 72 hours of your return back to Canada.
  • As best you can get out ahead of the unexpected:
    • BEFORE you travel, learn where and how to get tested at your destination to prepare for a seamless return home. IMPORTANT: To return home, Canada requires a PCR test (rather than the faster antigen test required by the USA and others). Costs for a PCR test typically start at about $100USD depending on your location. Resorts typically provide testing facilities onsite for both tests BUT plan accordingly – the PCR test requires anywhere from 12 to 36 hours to get the results. 
    • Consider and develop a worst-case scenario plan. Should you experience symptoms, particularly if your destination is not English-speaking and you don’t speak the language, know where to go for advice and help.

KNOW BEFORE YOU GO! Arm yourself with everything you need to know so you can make calm, informed decisions when you’re away. Your peace of mind will thank you!

COVID-19 testing and possible quarantine FAQs

Creston Valley insurance COVID-19 testing and quarantine travel insurance

What if I test positive for COVID-19 and need to quarantine while I’m away – are my quarantine expenses covered?

Your travel insurance will cover you in the event of a medical emergency. Unfortunately, that DOES NOT include quarantine.

Any expenses you incur – accommodations, meals, etc. – that are associated with quarantine will not be covered by your insurance.

Upon return to Canada, if COVID-19 test results are delayed, are my expenses covered as I wait for negative results?

Waiting for test results, even if delayed, is NOT a medical emergency. Expenses incurred as you wait for test results are NOT covered.

COVID-19 travel insurance FAQS

IMPORTANT: Will vaccination status impact my emergency medical coverage for travel?

This is one of the most common COVID-19 travel insurance questions. If you are NOT vaccinated:

COVID-19 coverage for travel within Canada is available regardless of your vaccination status. HOWEVER, as of December 22, 2021, coverage for unvaccinated Canadian travellers isn’t available for travel outside of Canada.

But, if you got out ahead and purchased the COVID-19 Insurance – Unvaccinated plan before December 22, 2021, eligible expenses related to COVID-19 will be covered.

Does my travel insurance cover the cost of required Covid-19 tests before, during, and at the end of my travels? 

Testing is a government requirement for travel and is NOT a medical emergency – NOT covered.

What do I use to prove my vaccination status if the country to which I’m travelling requires a vaccine passport?

If you’re vaccinated, you are have already been issued some form of vaccination document, passport, or QR code – if not all of the above – by your provincial government. Before you travel, be sure to get your Government of Canada vaccine QR code that is recognized internationally.

My vaccinations include mixed doses. Will this impact my travel plans?

More and more countries are accepting mixed dose vaccinations. Research your destination to confirm that you can enter with a combination dose. As of November 2021, Canadians with any combination of two doses of a COVID-19 vaccine can enter the United States. As it’s ever-changing check the Government of Canada website for the most updated information.

What about hospitalization or treatment for COVID-19 while I’m abroad, will I have coverage?

There are no specific exclusions for emergencies related to government travel advisories or COVID-19 outlined in the Travel Emergency Assistance Program. But, be sure to understand that your travel insurance coverage is subject to standard limitations and exclusions (preexisting conditions).

If you have questions about upcoming travel plans and any concerns regarding COVID-19 travel insurance, CONTACT US!

Radon Gas Testing

Radon Gas Testing – Winter Is the Ideal Time to Test Your Home

Better late than never! Last month was Radon Action Month in Canada – but any time this winter is a great time to test for Radon Gas.

A colourless, odourless, radioactive gas found in Canadian homes across the country, Radon Gas exposure is the leading cause of lung cancer in non-smokers. And while we’re a little behind – November is National Radon Action Month in Canada – we’d still like to remind you of how important it is to test your home for Radon so that you can be proactive, do as much as you can to protect the health of yourself and your family.

Depending on the Radon gas levels in your home and the length of exposure to this radioactive gas indoors, you could be at increased risk of developing lung cancer.

Make sure your home is safe! And Radon gas testing is inexpensive and pretty easy – winter is a perfect time! We seal our homes against the winter weather and cold, providing better conditions for accurate testing than in milder seasons.

What exactly is Radon Gas?

As mentioned, Radon gas has no odour or colour. It’s a radioactive gas that occurs naturally in the earth and is created through the natural breakdown of uranium, a heavy metal that occurs in most rocks. Consequently, Radon gas is in soil, igneous rock – surrounding the foundation of your home – and even well water. From the ground, it seeps up into your home through any cracks and holes in the foundation.

RADON gas in our homes canada

Radon gas levels vary significantly across Canada. Some regions are more prone to higher levels of indoor radon than others. Surveys identified that Saskatchewan, Manitoba, New Brunswick, and the Yukon experienced the highest percentages of homes testing above the recommended radon guideline. Yes, perhaps BC isn’t on the list as one of these zones. But, it’s still important to test your home as Radon gas exists at dangerous levels throughout all regions of Canada.

When you inhale Radon, you expose lung tissue to its ionizing radiation. This can damage the DNA in lung tissue and lead to lung cancer. More than 3,200 lung cancer deaths each year in Canada can be attributed to exposure to Radon gas.

One way to detect Radon in your home – testing!

Invisible and without an odour, the only way to detect Radon in your home is with a test. Fortunately, the testing is easy, effortless, and cheap – no excuses NOT to do it! And well worth it to protect your home and family.
Radon testing is simple:
1. Purchase a DIY Radon test kit. Radon gas levels often vary from day to day, week to week, and season to season.  You have the choice to test short-term, from two to 90 days or longer, more than three months. The longer-term tests, however, will offer more thorough information about the average Radon levels year-round.
2. Follow the directions included in your testing packet. The test devices are best placed in the lowest possible occupied level of your house.
3. Once the test has been in your basement for the required time, send it away to receive your results. If you’d prefer more specialized and expert care, you can hire a professional Radon measurement specialist to conduct the Radon test and provide your results.

Positive Radon test results? Next steps

If your test results indicate a high level of Radon in your home, mitigation is the next step to reduce or eliminate any Radon gas present. A certified Radon gas mitigation specialist can analyze your home. They’ll install and initiate the necessary radon mitigation.
The mitigation system will draw the gas out of your home and expel it safely outdoors. Sealing cracks and holes in the foundation is also a standard approach to radon reduction.
CVINS tiny home insurance for a tiny house

Tiny Home Insurance – Yes, You Should Have It!

Want to downsize? If you choose to live in a tiny house, make sure your property and belongings are protected with tiny home insurance!

With the popularity of tiny homes over recent years, and particularly during an ongoing, stressful, and costly pandemic, it inspires for many a move to downsize and simplify.

But, there’s a lot to consider if you’re pondering a tiny home as a solution to your downsizing needs. Throughout British Columbia, in many, if not most, communities, what constitutes tiny home living is still a question.

But, with the popularity of tiny homes, there’s been a change in attitude and bylaw when it comes to tiny home living. More than just a solution for those wanting to simplify, tiny homes offer one answer to the problem of housing affordability for many districts and municipalities throughout the province.

And, just because your home may be tiny, it doesn’t mean it should go uninsured. Any dwelling should be protected in the event of fire, water damage, or other circumstance that causes damage or loss. And while it’s not officially referred to as “tiny home insurance”, insuring your smaller or tiny home must be on your radar as you make your plans to significantly reduce your housing footprint.

What constitutes a tiny home?

If you’ve been living under a rock, or have not tuned into HGTV over the past several years, you may not be familiar with the tiny home. Beyond making the simple connection with the name!

A tiny home is very small. Typically they are no larger than 500 square feet – pretty small! They’re constructed using  a variety of different materials and methods and material, from stick-built to steel shipping containers. They are often mobile – built on a trailer or wheels – and can be easily moved.

A tiny home can still contain living and dining areas, a kitchen, a sleeping area and bathroom – with laundry! – and is intended for full-time, year-round living. Cottages, campers, recreational vehicles, and any other seasonal dwelling is not considered a tiny home.

Small and very economical, it’s no surprise that they’ve gained traction among homeowners who want sustainability and efficiency in their day-to-day living, including utilities costs and environmental impact.

The COVID-19 pandemic has accelerated the desire to buy a tiny home. According to a report from Narcity, searches for ‘tiny homes for sale,’ have seen a 55% increase since the beginning of the pandemic.

What is the investment in a tiny home?

While small, don’t assume a tiny home will be cheap. Either to build or to buy. Costs can vary quite significantly to build a tiny house, from $60,000 to well over $100,000, depending on where you are, the builder you hire, and the materials you use.

Again, depending on where you are, tiny homes can list for anywhere from $40,000 to almost $200,000. Still much lower than current average home prices across the province.

Considerations for tiny home insurance coverage

Yes, you’re considering a tiny house to save money and simplify your life, but tiny home insurance should still be part of that picture. Particularly, if it’s valued into the mid to high 5-figures or well into 6-figures. It is an asset that is high-worth that you’ll want to protect.

In the event of major damage, like that from a fire, for example, it could cost you many thousands of dollars to repair or rebuild, as with a larger home. That is where the right home insurance policy, even for your tiny house, will be very helpful.

With the appropriate policy, if and when you experience major damage to your tiny house – fire, water leak, extreme snow load, exceptionally strong wind – your property is covered.  It’s valuable coverage that can help pay for the necessary repairs, or even replacing your home, if required.

Even in your tiny home, you’ve invested significantly. Don’t risk losing that investment.

Building or buying a tiny home? What you should know

First, you need to explore your local zoning by-laws and regulations in your municipality or regional district. Before making any decisions or spending any money, be sure you understand fully any specifics – size requirements, if a foundation is required, building codes, etc.

Consult with your governing bodies prior to putting a tiny house on your property.

Be aware of the following:

  • Size requirements
  • Necessary building permits
  • Designing and building to comply with Building Code
  • Any municipal zoning that applies to your property
  • If building inspections are required during construction

Home insurance for a tiny house

As with any house, a tiny home is vulnerable to risk. Be sure to speak with your insurance agent to ensure that it’s eligible to be insured. Below is a bit of a checklist to see if your tiny house qualifies:

  • It is permanently parked or on a fixed foundation.
  • It is skirted – has underpinning that wraps around the base of a mobile, manufactured, or tiny home to enclose the crawl space beneath.
  • It complies with local standards or certifications.
  • Passed the Canadian Standards Association standard.

Before you invest in a tiny home, do your research! Consult your insurance agent to ask questions and learn more about insurance for your tiny home. Contact us today!

firesmart this winter to protect your home from wildfire

FireSmart in Fall and Winter for Summer Wildfire Protection

The next wildfire season will be here before you know it! Prep your home – get FireSmart in fall and winter.

Another wildfire season will be just around the corner. Do you think your home and property are prepared? If not, don’t feel discouraged. You can get FireSmart in fall and winter – easier than any other time!

If you aren’t familiar with the program, FireSmart™ helps us to more effectively live with and manage wildfires in our communities and on our property. It gives us the tools and information we need to become more wildfire resilient and share that responsibility with our neighbours and larger communities. It’s an all-encompassing program, that helps individual homeowners take on greater land management to protect their homes and properties.

And just because wildfire season is over in British Columbia and the cold weather is on its way, it doesn’t mean we have to wait till spring to prepare. In fact, to FireSmart in fall and winter is probably the best – and easiest – time to get ahead of it.

Wildfire – the anatomy

We know that wildfires need fuel to expand. To overtake an area, fire will consume everything in its path – from trees, shrubs, and grasses to structures themselves, if not protected. Some fuel – the surrounding vegetation – is more potent and flammable than others.

Look around your yard and notice the types of trees that surround your home.  You may see coniferous trees, such as fir and junipers. They will pose a greater fire danger than deciduous, or leafy, trees that are significantly less flammable.

In addition to fuel, the wind and even the wildfire’s energy can toss burning embers and debris up to two kilometres ahead of its path. Burning, airborne embers eventually drop to ignite anything they land on, including the ground, vegetation, and, of course potentially your home. These embers can cause serious damage as they burn and gain momentum. Because, inevitably, they too will launch ignited debris into the air to propel the wildfire further into the area or surrounding community.

How to FireSmart in fall and winter

According to Natural Resources Canada (NRC), they estimate that over the past three decades in Canada, wildfires and forest fires have destroyed about 2.5 million hectares (as many as 6 million football fields) each year. Fire suppression resources alone have cost approximately $500 million to $1 billion every year.

Given the profound damage fires cause each year, and as they become more and more prevalent, it’s vital you do as much as you can to protect your home and property. Thanks to the FireSmart program, there’s a comprehensive guide and resources available to maximize the fire resistance of your property to help reduce the likelihood of damage and loss.

As the number of devastating wildfires increases throughout British Columbia and our region, education is critical. In answer, FireSmart Canada offers a FREE online course, to guide homeowners and communities to better prepare against wildfire.

Take the FREE FireSmart 101 course!

Below are a few easy things you can do now and throughout the fall and winter to prepare and protect your property long before wildfire season next year.

Look at your yard!

FireSmart begins in your yard. Take stock of your landscaping – grasses, trees, shrubs, plants, and mulch – and identify those that might pose a fire hazard. There may be better options in landscaping materials that protect your property and still look nice. Look for those plants and landscape materials that offer fire resistance.

A FireSmart yard is comprised of primarily lower-profile (close to the ground), less flammable or combustible plants and shrubs that are adequately spaced. Remove any wood debris that is close to your home, including mulch that might be hospitable to burning embers.

Maintain a ‘non-combustible zone’ around your home. This zone will be 1.5-metres wide and contain more stone, rock, and soil than plants or wood debris.

how to firesmart your home and property

Evaluate your surrounding landscape
Consider the vegetation and landscaping materials that surround your home. Identify if it is flammable or fire-resistant. Flammable plants tend to have:

  • aromatic needles or leaves
  • oils or resin
  • loose, papery or flaky bark
  • fine, dry, dead material accumulation at the base

Fire-resistant plants have:

  • supple, moist leaves
  • minimal sap or resin material
  • sap that is water-like and has minimal odour
  • little or no accumulation of dead or dry vegetation at the base

What is the state of your grass? Mow frequently and keep your lawn shorter than 10 centimetres to help with fire resistance. Dry, longer grass tends to be more flammable. During the summer months, keep your lawn well-watered as best you can. But, wherever possible in your yard, try to reduce irrigation demand. Choose more plants that are drought-resistant.

Look at the ground. Do you use bark mulch? Is there an accumulation of pine needles? They are highly combustible materials, so as much as possible, try to keep them beyond 10 metres of your house or other structures. If you want to mulch your yard, choose fire-resistant mulch materials such as crushed rock or gravel.

Many of us use wood to heat our homes. Be sure that your woodpile is situated away from your house – stacks of dry wood poses a significant fire hazard! Additionally, be sure that your woodpile and chopping block is tidy and kept free of bark and wood debris as best you can.

Check your trees and shrubs
Of course, we love the trees in our yard! There’s nothing like being surrounded by greenery and nature – it’s why we live here! We want you to enjoy your trees – and be FireSmart. You can have a treed yard and still be fire-resistant. Instead of evergreens, plant leafier, deciduous, trees. Consider trees such as maple, poplar, birch, aspen, alder, cherry, ash, or cottonwood.

If you have or enjoy coniferous trees, it’s best to not have them within 10 metres of your home and keep them very well spaced (at least three metres apart). These trees include fir, pine, spruce, cedar, and juniper (super flammable!).

Keep in mind that when coniferous trees ignite close to your home, the intensity of heat is enough to set fire to your house. Once the fire is in the tops of coniferous trees, it easily advances from tree to tree – intensifying as it travels.

As you FireSmart in fall and winter, thoroughly clean and tidy any debris from around your house. Specifically, remove the flammable materials such as dry leaves, twigs, and branches. Get rid of those smaller coniferous trees as they ignite easily and fast. The smaller trees can provide a ‘ladder’ giving a fire an easy way up to the top of the tree where it can more easily leap.

Winter, or the dormant season, is the ideal time to prune trees. In fact, winter pruning is recommended and makes for healthier trees and shrubs come spring. When it comes to fire, dead or damaged branches can provide a fast and easy way for the fire to move from the ground to the upper limbs. Keep dead, dried materials and debris clear of the base of the trees.

Learn MORE about making your home FireSmart!

Questions about your home insurance coverage and how you’re protected in the event of a wildfire? TALK TO US!

Creston Valley Insurance When You Hit an Animal While Driving

When You Hit an Animal While Driving — What To Do!

Close calls with wildlife on the road are frighteningly common. If you do hit an animal while driving, a clear head and preparation are vital.

Even with ever-longer days, wildlife on the road is still very much a hazard. Deer, elk, and even moose can be difficult to see at the best of times, but especially so in the dim light of dawn and dusk.

Blending easily into roadside flora, wildlife can all of a sudden appear as though from out of nowhere, launching with frustrating randomness into the road and oncoming traffic. When you live where we do, being extra attentive to animals while driving is essential to road safety. Yet, accidents that involve collisions with large game are frighteningly common.

Despite how often it happens, most of us aren’t at all prepared with how to handle a vehicle collision with an animal. But, with a little education and preparation, you can respond calmly and humanely as you manage the situation as well as your insurance.

Below are the recommended steps to take if you find yourself in such an unfortunate situation. Preparation is key, particularly when it involves such a common potentiality as hitting an animal with your vehicle.

Follow the steps below should you find yourself in the frightening and unfortunate situation of having hit an animal while driving.

Ensure for the safety of yourself and your passengers

You can’t anticipate an animal all of a sudden appearing in front of you while driving. If it occurs, and you hit the animal while driving, follow these safety protocols to reduce further risk of harm:

  • Pull off the road immediately, or as soon as it’s safe to pull over
  • Check that everyone in the vehicle is unharmed
  • Turn on your hazard lights
  • If the animal is incapacitated on the road, direct your headlights towards it to alert other drivers
  • Don’t approach the injured animal – it will be in great distress and possibly very dangerous.
  • Don’t leave the scene without checking your vehicle for possible damage, including missing parts, fluid that’s leaking, or smoke. You may need the help of a tow truck.

It’s not unusual to want to help an injured animal, particularly if it’s still alive. But it can be very dangerous. You should call Animal Conservation and inform them of the situation so they can take care of the situation safely and humanely.

Collect information from the accident scene

No matter what kind of accident you’re involved in, it’s important to collect as much information as possible at the scene. And that includes a collision with an animal. When you make an insurance claim you want to ensure that you have photos or video of the animal, the surrounding area, the damage to your vehicle, witness documentation – statements and contact information.

If necessary, call 911 for the police

In the event of a bad collision, where the animal is incapacitated and blocking the road, it’s best to err on the side of caution and call for help. After you have hit an animal while driving, the police can help direct traffic and notify other drivers until the animal can be removed safely from the road.

Certainly, if there is damage to your vehicle or you or any of your passengers have sustained injuries, you should notify the police. You may have to fill out a police report, and your insurance provider may, in fact, request it.

Be sure to call the police in the event of the following circumstances:

  • You’ve hit a large animal and it is incapacitated in the middle of the road and a hazard to other drivers.
  • If you have sustained damage to the vehicle or injuries – the police will help you file a report.
  • If you need help to move the animal.
  • If the animal is still alive and needs to be transported to get the help of a veterinarian.

Contact your insurance provider

Along with a call to the police, it’s recommended that you call your insurance agent as soon as possible if your vehicle is damaged when you hit an animal while driving. It’s not unusual for your insurance provider to request all details including any photo or video. When you call your insurance broker right away, you are better able to recall all the necessary information much more clearly and specifically. The sooner you report damage to your vehicle, the sooner you’ll get the assistance you need.

If you have an auto insurance policy with comprehensive coverage, you may be covered if you hit an animal while driving.

Speak with one of our agents today to see if you have comprehensive coverage. 

Get in touch with a Creston Valley Insurance representative today!

You want to have the right coverage in the event the unexpected happens. We can provide the expert, professional advice you need to help you navigate any unforeseen accident such as this. Whether you’ve had an accident with another vehicle or with an animal, we will help guide you through the claims process.

We make it easy to get the insurance you need:

Do you have questions about your auto insurance? Talk to us!

Creston Valley Insurance - Prepare Your Property for Spring Thaw

Spring Is In the Air – Prepare Your Property for Spring Melt!

After a tough late winter – oh-so-cold! – spring is officially in the air! Just be sure you’re prepared for the spring melt!

Whilst we all welcome spring, particularly after a horribly cold February, the change of season can pose some hazards, however. Spring melt primary among them – be sure you’re prepared and that your home and property is protected.

As we anticipate and enjoy the gradual increase in temperatures, further and further from freezing, over the coming weeks, it’s vital to ensure that this pleasant turn doesn’t cause damage to our homes.

According to Don Thompson, Chief Operating Officer for SGI Canada,

“There’s a lot you can do to make sure that when the snow melts, water makes its way to the drain and not into your home. A little time spent now could save you a big headache as the weather warms up. This much snow so late in the season could result in a very fast melt.”

To protect the safety and integrity of your home and property during the spring melt, particularly if you’ve been the recipient of ample snow, requires some keen observation, just a little planning, and a few proactive measures. Here are a few easy tips to help you take the appropriate preventative steps to better assure the health and safety of your home:

  • Inspect the entire property as soon as possible. Inspect your home’s surroundings – foundation and basement, decks and patios, sidewalks, and driveways. Ensure that they are able to resist water and, as best you can, water can be directed away from dwellings and buildings.
  • Tidy and clean up around your home as early as you can.
  • Inspect downspouts and eaves. Be sure that all downspouts extend away from structures and walls so that water drains safely away from your home and into your yard.
  • Do you have a sump pump? Be sure that it’s functioning properly. If it’s working as it should, your sump pump will prevent flooding in your home. You might want to consider adding back-up battery power to ensure that it continues to do its job even in the event of any electrical outages. If you tend to get heavy snowfall and don’t have a sump pump, you might want to think about getting one.
  • Backflow valves will close automatically to prevent water and sewage from overflowing into your home in the event of a sewer backup. A great preventative solution, backflow valves are installed on your basement sewer connections such as toilets and drains.
  • If there is damage, don’t throw anything out! Keep any damaged items in a safe place until the adjuster can assess them. If any belongings are wet and/or damaged due to flooding, move them to a dry area with good ventilation.
  • When you have a furnace or other appliance that has come into contact with water, before you use it, be sure to have it checked for damage and safety by a qualified dealer, technician, or service person.
  • If moisture, water, or sewage has overflowed into your home, don’t touch any electrical panels or systems until you know it’s safe.

Be sure that you record any cleaning or repair expenses as you’ll need to include them in an insurance claim. For extra protection, we encourage our customers to take pictures or video of damages to provide to the insurance adjuster.

Yes, your home insurance is designed to cover you in the event of damage to your home during a spring melt. But, it’s terribly inconvenient to incur damage due to water and other possible flooding. Spare yourself the headache – be proactive! Take even a few precautions to ensure your home is prepared for a dramatic change of seasons.

Do you have questions about your home insurance and exactly what’s covered? Talk to us!

Creston Valley Insurance shovel safely

Clear Your Walks and Driveway of Snow – How to Shovel Safely!

Keep your property safe from accident liability by clearing snow and ice. Keep yourself safe from pain and injury – shovel safely!

Our British Columbia winters are typically all over the place when it comes to weather. It can be dumping snow one day, raining the next, followed by a drop into the deep freeze within hours. It makes keeping your property safe – clear of ice and snow – a challenge.

It’s vital that you take the time to do so, however, to protect yourself from possible liability in the event of an accident by someone visiting your home or property.

One of the most common practices to keep our homes accessible and free of snow, of course, is shovelling. Unless you’ve made the investment in a blower, many of us will spend countless hours with a shovel in hand, removing snow from our walk- and driveways.

If you’re not physically prepared for the demands of snow shovelling, you could leave yourself vulnerable to pain or injury – over-exertion, a pulled muscle, or a slip and fall. There are even more dire possibilities known to occur while shovelling snow. A study from the Canadian Medical Association Journal found a link between the exertion of shovelling snow and heart attack.

It’s not unusual for our cold Canadian weather to increase heart rate and blood pressure. It also causes blood to clot more readily and makes the arteries constrict, and restrict blood flow. Add to that the sudden exertion of moving seemingly endless pounds of snow, and it can, for some, put extreme strain on the heart, putting you at risk of a heart attack.

This isn’t necessarily reason to give up shovelling! There are ways to shovel safely to ensure you get the job done and do it in a way that you protect yourself:

Prepare yourself to shovel safely

To ensure that you begin your shovel safely, there are a few things you can do to prepare:

  • Start moving your body. Light stretching – arms, shoulders, and legs – can help prevent injuries.
  • Layer your clothing to keep warm, but also to allow you to shed as you need.
  • Avoid cotton underlayers as they will only dampen as you sweat and make you cold.
  • Remember to breathe. As with exercise and yoga, exhale on the exertion.
  • Allow yourself to take a break when you need to. If you push through, you run the risk of over-exertion or potential injury. If you maintain a more sedentary lifestyle, this is especially true.

Shovel preparation

After you’ve prepared yourself physically for shovelling snow, be sure to consider prepping your shovel, too.

Spray the shovel with cooking spray or wipe it down with vegetable oil or paraffin wax before you get started to prevent the snow from sticking. When you help keep the shovel clear of clumping you can shovel easier and faster.

Shovel safely with proper technique

It’s critical that you are conscious of your shovelling form and technique:

  • As with anything you lift, be sure to bend the knees and lift the load with your legs – NOT your back!
  • As you lift the shovel, keep its blade close to your body to help reduce any strain on the back.
  • Remember to be ambidextrous! Alternate between shovelling with your right hand and left to balance the workload and exertion on the body.
  • Switch up the grip of the hand that holds the bar – palm over vs. palm over, for example.
  • When you’re clearing more than a foot of snow, don’t attempt to clear right to the ground with one shovelful. Start with the surface six inches, then move the lower six. Lifting too much in one scoop makes you vulnerable to injury.
  • Shovel while it’s snowing? Yes! Don’t be afraid to get a headstart on your shovelling. It may mean a bit more time with a shovel in your hands but the job will be easier than waiting to do it all at once.

How old is too old to keep shovelling?

The age to stop shovelling snow depends entirely on the condition of your overall health. Certainly, if you have any concerns be sure to check with your doctor before the first snowfall.

Like every activity, everyone comes with a different level of fitness and health. To ensure that you’re able to safely shovel snow for years to come, ensure that the rest of your life is one of healthy choices and activities to maintain your health.

Young or old, there are a few ways to make snow shovelling safer and easier:

  • Enlist the kids! There’s nothing wrong with including the whole family — make it fun and with more hands, it will go that much faster. Offer a tasty reward when it’s done – hot chocolate all around!
  • As mentioned, don’t hesitate to begin while it’s snowing. There’s no real advantage to waiting till the snow stops. In fact, it’s only likely to be more work and you increase your chances of over-exerting yourself.
  • Drink water. Like any exercise, proper hydration is vital to keep you energized.
  • Pay someone to do it. It may be that you’re better able to stay on top of the job when you hire it out – the kid next door or a professional service. Ultimately, it’s the safety that’s important and if you’d prefer not to do the grunt work, hire someone that will.

Be proactive. Take precautions before it snows.

To help manage the impacts of snow and ice, take a few preemptive steps to help keep your walks and driveway clear. This may surprise you, but for maximum effectiveness, salt is meant to be spread before it snows. Many of us have been laying salt after we shovel, but it’s actually meant to be used before the snow falls to prevent it from sticking. It will make your snow shovelling safer and easier, too!

Other pre-emptive measures to ice-proof can be achieved with ingredients you likely already have in your home:

  • To keep your steps, sidewalk, or driveway from collecting ice, make a treatment of brine the day before an anticipated snowfall or winter storm. Dissolve salt in hot water 24 hours in advance and simply pour a thin layer onto your walkways and steps to not only keep ice from forming but also to help make the snow easier to remove.
  • Likewise, to prevent ice from forming on your car’s windshield and windows, spray a mixture of 3:1 distilled vinegar and water before winter precipitation. Spray after ice collects to help melt it more rapidly.

Questions about your home insurance and seasonal risks? Talk to one of our knowledgable insurance brokers! 

Creston Valley Insurance protect against snow and ice

Protect Your Home and Yourself on Snow and Ice This Winter

If the snow hasn’t arrived yet, it will soon. Protect yourself and your home from potential accidents on snow and ice – and possible liability! 

Winter is descending upon us. Brrrrrrrr. And with so many more people staying home instead of heading south this winter, the chances for potential accident and injury associated with snow and ice around our homes are just that much greater.

It’s important to realize that, as a homeowner, you are responsible for the safety of your home and property. To ensure the safety of visitors to your home, it’s up to you to ensure that your sidewalks and other walkways, stairs, and your driveway are kept free and clear of snow and ice.

As the cold weather brings us the stark, sparkly beauty of snow and ice you should be aware of the most common winter hazards that come along with it.

For instance, any walking surfaces around your home need to be managed with salt and/or sand and frequent shovelling when necessary. In many communities, there are bylaw timeframes that dictate when you need to have walkways clear. Be aware of them. Also, evaluate your property for unexpected elevation changes and surface gaps or cracks – uneven sidewalks are a good example. These present the potential for trips and falls so be sure to fix any issues that lie on your property. If you notice issues with municipally-owned land and property, be sure to report them.

At this time of year, as we transition from fall to winter conditions, natural debris such as wet leaves can also present a slipping or tripping hazard. If you have deck- or handrails, be sure that they are in good repair – none are loose or missing – and don’t pose an unexpected danger.

Ensure that all of your exterior lighting is operational and adequately illuminates the surrounding area, including the walking surface.

Don’t forget your indoors at this time of year. Your foyer could pose an unnecessary risk to visitors if your walking surfaces are wet. Prevent the chance of slips or falls in your home with a simple fix – a non-slip mat or rug.

What do I do if an accident happens?

While you’ve taken all the precautions, there’s is still the chance that something unexpected could happen. But, to help protect yourself, here are various steps to take if a snow- or ice-related mishap occurs:

  1. First, of course, is to provide assistance to the injured individual. Find them the appropriate medical treatment, if needed and certainly, call an ambulance, if required.
  2. Collect all of the necessary information – names and contact information of both the injured party as well as any witnesses. Be sure to detail everything that happened – descriptions of the incident from the victim, yourself, and any witnesses.
  3. Be sure to refer the claimant to your insurer. DO NOT ADMIT LIABILITY!
  4. A picture is worth a thousand words. Take photos of the scene. If you can, take pictures of the injured individual’s footwear.
  5. Document, document, document. In the event you need to provide a defence for a claim,  thorough documentation will assist your insurer to analyze the incident and the potential cause.
  6. You need to report the incident and details to your insurer. As much as possible, provide:
    1. Incident details —  a thorough description with photos, whenever possible.
    2. Any information you may have regarding your preventative maintenance preceding the incident. You’ll want to show you were acting responsibly to prevent any issues on your property.
  7. Thoroughly evaluate your home and property and explore the potential causes. Important: take all necessary steps to ensure you prevent any similar incidents from happening again.

In the event of a mishap… what is my legal liability?

Of course, you’ve tried to manage the winter maintenance of your home and property, particularly walking surfaces, to the best of your ability. But… if something has been missed, or if you’ve been a little late to keep up with a basic standard of seasonal maintenance, depending on the victim, you could be held liable for any trips, slips, or falls due to snow and ice.

If you rent your home, this liability could be shared with the owner of the property, your landlord. It will depend on the circumstances surrounding the incident to determine the ultimate responsibility. When it comes to shared or community space on the property, as the tenant, be sure that your rental agreement outlines very clearly your responsibilities.

Here are factors that will be considered:

  • Was this a hazard that could have been foreseen?
  • Did the homeowner, in fact, maintain the property according to acceptable standards?
  • Had this been a hazard for an unreasonable or extended amount of time?
  • Could the hazard have been prevented?

Prevention is key to ensuring your home is safe for everyone who visits – the babysitter, the postal worker, your furnace repairman, visitors to a Holiday gathering, it doesn’t matter who. Be vigilant as you evaluate the conditions and how your property can be kept free of dangers. Maintain your property to the highest safety standards to prevent any unforeseen accidents or mishaps that could lead to costly litigation.

Do you have questions about your home insurance? Talk to us!

Creston Valley Insurance protect your home and family from COVID-19

A COVID-19 Guide – 12 Ways to Protect Your Household

Back to work and school. How to protect your home and family from COVID-19 in this age of the new normal.

This week marks back to school for many local youngsters. And while most of us seemed to resume some degree of normalcy throughout the summer, the spectre of COVID-19 still continued to influence our social behaviours.

Many of us are now wearing masks when we enter into public spaces. We dutifully bring our grocery lists so we don’t spend too much time browsing the store aisles. We are now always washing our hands and sanitizing – everywhere we go, and seemingly constantly.

And there’s no end in sight. COVID-19 will continue to be part of our everyday consciousness. With our kids going back to school and workplaces allowing more and more employees back into the office, chances are we’ll continue to be on high alert for the days, weeks, and months to come.

While we may provide home insurance to help protect your home, the presence of COVID-19 and protecting your household will be up to you, with the support and cooperation of the rest of the community.

To keep your home and family safe and healthy over the next many months, it’s critical to continue to follow the recommendations of our public health authorities, experts, and officials.

The following checklist will help you do your part to help reduce exposure and slow the spread of illness as the pandemic persists:

      1. Keep up-to-date with factual information from local health authorities and experts.
      2. Keep up with school closures in the community – rely on local news sources that report on school alerts.
      3. If you get sick, stay home from school, work, and any other activities where you would be at risk of exposing others.
      4. If you learn about others who are ill, steer clear! Help where and how you can, but don’t risk exposure.
      5. Continue with physical distancing measures as best you can when out and about – stay at least two metres apart.
      6. Practice prevention:
        • Frequent handwashing with water and soap for the length of time it takes to sing ‘Happy Birthday’. When soap and water are unavailable, keep hand sanitizer (with at least 60% alcohol) nearby – in your purse and in your car, for instance.
        • Always cover your mouth and nose when you cough or sneeze – the inside of your elbow provides good protection. Dispose of any tissue you may use immediately and don’t use it again.
        • Wipe and sanitize items such as mobile phones, television remotes, laptops, and other electronics – as recommended by the manufacturer.
        • Keep high touch zones and items as well as high traffic areas clean and disinfected using household cleaner and water. Your typical EPA-registered household disinfectants are just fine. Utilize disinfectants that are appropriate for the surface.
      7. If a member of your household gets sick, isolate them as best you can, including a separate room as well as a separate bathroom, if you can.
        • Provide ill family or household member with clean and disposable masks to wear at home
        • Do not share personal items – drinking glasses, silverware, food, or drink.
        • Keep the room and bathroom used by sick household member clean, sanitized, and disinfected.
      8. Keep in touch with friends and family to check in on their health and well-being – phone, text, email, video-conference.
      9. Keep lines of communication open with family members and your children – talk about the pandemic. Offer calm reassurance that they are safe and what they can do to help contain the spread.
      10. If you find yourself or a family member is sick, notify school and workplace immediately. Request to work and school from home if you are able.
      11. If a child has to be home from school, keep communication open with school administration and teachers to ensure your child doesn’t fall behind in schoolwork.
      12. Teenagers and young adults may find it particularly difficult to maintain recommended protocols.
        • Keep communication open with your older children and discourage kids’ gathering after school hours.
        • Let them choose a mask they like and stress the importance of wearing it when they’re outside the home.
        • Make it clear how their behaviour could potentially impact the spread of COVID-19 in your community as well as your household.
Creston Valley Insurance wildfire season

How to Protect Your Home During Wildfire Season

A dry, hot spell means wildfire season isn’t far away. Do what you can NOW to help keep your home protected.

Despite the long, wet spring the recent run of hot weather means that wildfire season can’t be far behind. As the world witnessed the savagery of wildfires as they devastated Australia late last year and early into 2020, it wasn’t hard to imagine what Australians were feeling, living where we do.

We’ve seen recent examples of devastation by wildfire closer to home: the Fort McMurray fires that ravaged a whopping 590,000 hectares and destroyed 2,400 homes in 2016; the state of emergency declared in British Columbia in 2017 and 2018 due to record-setting wildfires.

It’s important, with increasing evidence of climate change, to understand how vulnerable our surrounding forests and environments are to lightning strikes. Add increased human activity in remote areas and increased risk of fire caused by people (unintentional and arson) into the mix, and a hot summer becomes a literal tinderbox of potential wildfire risk.

This summer, Natural Resources Canada (NRC) has predicted a wildfire season that is “well above average,” throughout the nation – from British Columbia to Northern Ontario and the territories. NRC is anticipating that parts of the prairies and B.C. could even see fire season and an elevated threat of wildfires extend well into September.

In a situation that seems so beyond your control, what can you do to be prepared? While saving your home is not a sure thing in the event of real wildfire threat, there are a few things that can help you protect your home as best you can:

Identify if yours is an area of high-risk for wildfires

Did you know? Approximately nine per cent of the world’s forests are here in Canada. Given that, it’s important to understand that wildfire is as vital for forest renewal as the rain and the sun. Forest fires release vital nutrients that exist on the ground and they clear the canopy above for sunlight, which helps to stimulate new growth.

But, as critical as fires are to renewing our forests, more and more are sparked and burn closer to communities and individual homes. According to NRC, over the past 30 years, Canadian wildfires have consumed approximately 2.5 million hectares per year. Not only is this at tremendous cost to land and property, but it’s also a tremendous amount of money in fire suppression efforts, to the tune of $500 million to $1 billion a year.

How do you know if your area is one at high-risk? Is your community or home surrounded by forest, brush, or grassland? You are at higher risk for wildfires, particularly during the summer months. The Canadian Wildland Fire Information System by NRC monitors the fire danger across Canada constantly and offers an interactive fire map with up-to-date reports.

Consider your building materials very carefully

If you live in a high-risk area like ours, particularly with the elevated wildfire threat this summer, the best protection against loss, damage or injury is prevention and mitigation is your building materials, according to the Institute of Catastrophic Loss Reduction (ICLR).

According to a report by the ICLR on trends in North American wildfire events, “The knowledge exists to make homes less vulnerable to wildfire. Firewise homes have a survivable landscape and use appropriate building materials. Investments of a few hundred dollars can significantly reduce the risk [of] wildfire damage.”

Fortunately, there are organizations that work alongside insurance companies to provide resources to homeowners and builders and homeowners to construct fire-resistant homes.

As an example, the ICLR has supported the adoption of Wildland Urban Interface provisions in national building codes, working closely with partners like the National Fire Protection Association (NFPA) and FireSmart Canada.

A huge concern for homeowners is flying sparks and embers that can ignite your home. According to FireSmart, this burning debris can be thrown up to two kilometres ahead of a wildfire. A wildfire’s radiant heat, alone, can even break windows and melt vinyl siding. Of course, any flammable items in the fire’s path will ignite in direct flames.

It is recommended to establish a non-combustible zone up to 1.5 metres around your home – clear of any materials that could easily ignite. FireSmart suggests reducing evergreens, shrubs, and highly flammable junipers, within 10 metres of any structures. Thin and prune trees within 10 to 30 metres of your home and ensure that powerlines are free and clear of any tree limbs.

If you’re building new or renovating, ask your contractor about those materials that might help mitigate damage and loss from wildfires. Construction materials that are fire-resistant include products such as fibre-cement siding instead of wood shakes or vinyl siding, asphalt shingle roofing rather than wood shakes, and concrete decking material in place of wood.

In today’s buildings, materials such as concrete and steel can be made with a wood grain appearance. Modern, innovative building materials allow homeowners to enjoy the best of both worlds – beautiful aesthetics and safety.

A checklist for a more fire-resistant home

The prospect of wildfire is terrifying to most homeowners but there are a variety of ways you can help to protect your home:

  • Gutters and eaves: It’s very important to clear gutters of buildup from leaves, branches and other debris regularly – these are easily ignited by embers or sparks.
  • Windows: Replace any single-pane windows with tempered, thermal (dual-paned or multi-paned) windows, as the intense heat from approaching wildfire can break single-pane windows. Metal screens help to reduce radiant exposure and can protect against any entry of sparks or embers.
  • Doors: All doors should be fire-rated and have a proper seal. Not just your home, but garage and outbuildings, as well.
  • Vents: Vents offer an entry point for sparks and embers into your home. Install fire-rated vents and screen any vents or other openings to minimize the risk of drifting sparks or embers getting into your home.
  • Siding: Vinyl siding and untreated wood products provide little to no fire protection. Consider products such as stucco, brick, and metal or fibre-cement siding, that all offer good protection from fire.
  • Roofing: As with siding, consider a fire-resistant roof material such as metal, asphalt, clay or composite rubber tiles. Untreated wood, like shakes, is easily combustible and it can also leave crevices where sparks or embers can get into your home.
  • Chimney: Minimize the chance of your chimney starting a fire outdoors onto nearby buildings and brush – install a spark arrestor.
  • Decks: Choose a non-combustible decking product.
  • Landscaping: Keep your landscaping tidy with the lawn kept short. Grasses that are allowed to dry out along your fence become an opportunity for a wildfire to catch on your property.
  • Sheds and outbuildings: Follow this checklist for those buildings within 10 metres of your home – garages, sheds, workshop, guesthouse, and even outhouses.
  • Fence: A wooden fence can lead a wildfire directly to your house. Install a metal gate as a separation between your house and your wood fence.

Chances are, your home insurance policy (as well as auto, condo, tenant, farm and commercial) protect you from damage caused by wildfire.

Questions about home insurance or other policy? We can help — TALK TO US!